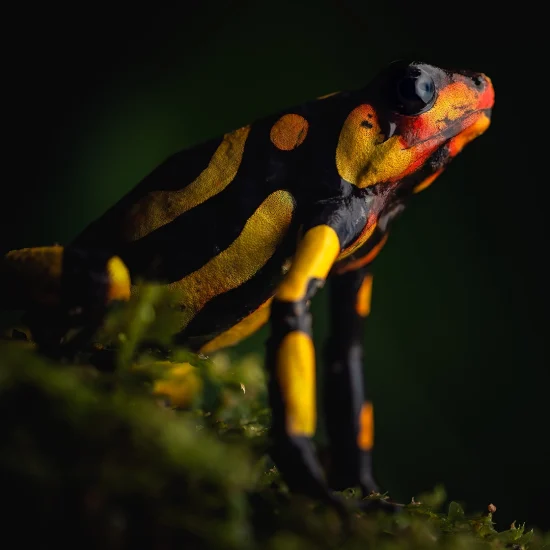
Nature Photography Tips for Our Tours

Our tours are, above all, time in the field: walking slowly, watching what an animal does before raising the camera, and sharing it with a small group. You don’t need a professional camera or prior experience to enjoy them. If photography is your passion, these recommendations will help you make the most of every outing.

You don’t have to know everything before you arrive. In the field, your Tour Leader works with you on technique and on reading light, behavior and habitat. Your tour’s Recommendations tab adds what is specific to that trip.

Think about how much gear you can, and want to, carry. Before you pack, ask yourself: will there be long hikes or short walks? Different settings (humid forest, night walks, wetlands, high mountains)? How much weight can you realistically manage for a full day?

  • If you prioritize comfort: a compact camera with a versatile zoom, a small optional flash and a GorillaPod instead of a tripod.
  • If you want to live the experience without carrying gear: an action camera or your phone is enough to bring home good memories.

Travel light: leave the “just in case” items at home.

Your Field Guide

For all our photography tours

Ethics and Animal Welfare: How We Work in the Field

At Keeping Nature Tours, photography is a tool to observe, learn and protect, never an end in itself. No photo is worth stressing an animal or damaging its habitat.

Field ethics: the rules we follow

  • The animal’s well-being comes before the photo. If it becomes alert, stops what it was doing or moves away, you are too close. The animal sets the distance, not your lens.
  • Travelers don’t touch, move or handle wildlife. If an animal has to be moved, for example to get it off a trail, only your Tour Leader does it: amphibians with new, powder-free nitrile gloves moistened with water from the site, and snakes with a hook, never by hand. It takes the shortest time possible, and the animal is released right beside where it was found, in the same microhabitat, never carried to another site.
  • We never pose, cool or reposition an animal for a photo. If the shot doesn’t work where the animal is, we let it go.
  • Playback (playing recorded calls to attract birds): minimal and brief, never insistently, never with threatened species or during the breeding season. Some reserves prohibit it.
  • We leave the habitat as we found it: no cutting branches or clearing vegetation to “clean up” a background, no pulling, tilting or draining bromeliads (many poison frogs raise their tadpoles in the water they hold), and we keep our distance from nests and roosts.
  • Flash with nocturnal or sensitive wildlife: diffused, at the lowest power that works and with only a few frames per animal, always following your Tour Leader. We stop as soon as the animal shows stress.
  • Honest images: we don’t present captive, baited or AI-generated wildlife as wild.
  • We don’t share the exact location of threatened or trafficked species (such as poison frogs), nests, roosts or leks. Before you post, turn off geotagging or remove the location data from the file.
  • Leave no trace: no litter, no food scraps, and watch where you step.

A photo you can identify is also data. If you upload your sightings to iNaturalist, set the geoprivacy of sensitive species to “Obscured”: the public map shows only an approximate area, and your record can still reach Research Grade and help science.

Respect for places and communities

We work to keep our footprint small, both on ecosystems and on the communities that host us. We ask the same of you:

  • Bring a reusable bottle and avoid single-use plastic.
  • Respect the customs, traditions and sacred places of each community.
  • Keep voices low: noise drives wildlife away.
  • Take your trash with you and use recycling points where there are any.
  • Put the phone away for a while and let the camera, and your own eyes, do the work.

General Field Recommendations

Most of our tours run in humid, biodiverse ecosystems, looking for amphibians, reptiles, birds and landscapes. If your tour goes to cold or high-altitude places, your tour’s Recommendations tab lists what changes. To enjoy the field and keep you and your gear safe:

  • Follow your Tour Leader. They know the terrain and how each species behaves. Stay with the group, especially on night walks: it protects you and the wildlife.
  • Dress for heat, humidity, rain and mud. Tropical weather changes in minutes. Wear quick-drying clothes, waterproof boots, a poncho or rain jacket, a hat, sun protection and repellent. Long sleeves protect you from sun and insects. Avoid jeans and anything slow to dry.
  • Mind the terrain. Trails can have mud, roots and slippery rocks. Wear rubber or waterproof trekking boots, light grip gloves and, if you like, bring a walking pole. At night, carry a headlamp with spare batteries and keep your camera on a sturdy strap.
  • Keep an eye on your belongings. Don’t leave cameras, phones or batteries charging unattended, and keep your things close in cities and bus terminals.

Essential Packing Checklist: Dress for the Tropical Forest

Pack light, protect your gear and bring the essentials:

  • A durable, comfortable backpack, ideally waterproof or with a rain cover.
  • A reusable bottle or thermos, to stay hydrated all day.
  • Waterproof trekking boots or rubber boots, for mud and constant humidity.
  • Comfortable shoes or closed sandals for the lodge.
  • Lightweight, quick-drying, breathable clothes (no jeans or cotton).
  • A long-sleeve shirt, against sun, insects and branches.
  • Sun protection: hat, cap, buff or neck gaiter.
  • A compact waterproof jacket, for sudden rain.
  • A foldable umbrella or plastic poncho, for long rain.
  • Sunglasses with UV protection.
  • Water-resistant sunscreen (not optional), biodegradable if possible.
  • Cream insect repellent (Autan or similar). Keep it off your hands, or wash them before you handle your camera: repellents with DEET can damage rubber grips, plastics and lens coatings, and amphibians absorb chemicals through their permeable skin.
  • A small towel or microfiber cloth, to dry gear or sweat.
  • A headlamp or flashlight (not your phone) with spare batteries, essential on night walks.
  • Light grip gloves, for spiny palms and rough bark when you grab a trunk for balance. Even with gloves, look before you grab: branches can hide ants, wasps or snakes.
  • Dry bags and silica gel, against humidity and condensation.
  • A foldable trekking pole (optional), for slippery ground.

Packing Smart, Discipline by Discipline

Every subject asks for a different kit. Here is what to bring for each kind of photography on our tours, and what you can leave at home. Not sure? Tell us which camera you have and we'll help you prepare before the trip.
Landscape Photography

Getting where few people go means light gear and legs ready for long hikes.

  • Camera and a wide-angle lens.
  • Filters: a polarizer is key (it deepens skies and cuts reflections on water and wet leaves). An ND filter lets you use long exposures (silky water, soft skies), and a graduated ND (GND) filter balances a bright sky with a darker foreground. With an extreme wide-angle lens, a polarizer can darken the sky unevenly.
  • Tripod and remote release (a cable or remote that fires the shutter without touching the camera): together they keep the shot steady and sharp in low light.

Macro Photography

Amphibians, reptiles and other small subjects ask for precision, patience and gear ready for the tropics: high humidity, low light and subjects that move. Every walk is a chance to show the texture of wet skin or the shine of a scale under the headlamp.

  • Camera and macro lens (ideally 90 to 105 mm). No macro lens? Affordable options: a reverse ring (mounts your 18 to 55 mm kit lens backwards), extension tubes, or close-up lenses (for example Raynox DCR-250 or DCR-150).
  • A wide-angle macro lens (around 15 mm) is ideal for environmental portraits: it shows the animal in its habitat and tells more of its story.
  • Depth of field in macro is minimal. Work with narrow apertures (f/11 to f/16), often with manual focus (autofocus hunts this close), and if you want everything sharp, ask us about focus stacking.
  • Lighting is the most important part: an external flash, ideally off camera with a transmitter and receiver, and a good diffuser that softens the light and avoids harsh reflections on wet skin. A reflector or bounce card fills shadows without a second flash. No flash experience? We'll teach you, and show you how to build your own diffuser.
  • Supports: a tripod to compose or hold the flash, and a GorillaPod or articulated arm (for example Wimberley Plamp II) to hold the light, or to steady a stem moving in the wind. Clip it gently, without bending or breaking it, and never on the stem where an animal is resting.

Bird Photography

Often the most frustrating and the most rewarding: it takes patience and knowledge.

  • Camera, telephoto lens, and a tripod or monopod.
  • Know your subject: understanding the species (where it perches, how it moves) lets you anticipate the shot. Your Tour Leader is your best ally here.
  • Burst mode, so you don't miss the moment.
  • Continuous focus (AF-C on Nikon and Sony, Servo AF or AI Servo on Canon) keeps a moving bird sharp.
  • Exposure time by subject: 1/500 s for a perched bird (slower only if it is very still and your lens is stabilized), 1/1000 s to 1/2000 s in flight, and 1/2000 s to 1/4000 s for small birds and quick wingbeats. Hummingbird wings beat so fast that even 1/8000 s can leave them blurred. A little blur looks natural; to freeze them, photographers use flash at low power, because its burst is much shorter than any exposure time. Always focus on the eye.
  • Light: the sun at your back (front light) is the most reliable place to start, with even color and clean detail. It isn't the only option: side light shows texture and volume, and backlight outlines the feathers. Avoid harsh midday light.
  • Keep your distance from nests, and never use playback with threatened species or in the breeding season.
  • Safety: never look at the sun through an optical viewfinder with a telephoto lens. It can cause serious eye damage.

Which Backpack Is Right for Your Photo Gear?

A good backpack protects your gear and keeps you comfortable, especially if you carry several lenses or travel to humid regions like the Chocó. Look for one that:

  • Is light and doesn’t add weight on long hikes.
  • Is waterproof or has a rain cover for tropical downpours.
  • Keeps your gear organized and easy to reach, so you don’t miss a moment looking for a lens.
  • Protects against bumps with padded, adjustable dividers.
  • Resists theft, ideally with the zippers against your back in cities and bus terminals.

Reference brands: Lowepro, MindShift Gear and F-Stop. For maximum protection, a Pelican hard case.

How Do You Protect Your Gear from Humidity?

Humidity and rain are the biggest challenge on these tours. The main risk is condensation from sudden temperature changes: it fogs lenses, corrodes electronics and encourages fungus.

  • The key technique: when you move from cold into humid heat (for example from the páramo, or from an air-conditioned room into the heat of the Chocó), seal your gear in a bag while it is still cold and let it warm up slowly before you open it. Condensation forms on the bag, not inside your camera. In general, make temperature changes gradual.
  • In the field: use waterproof covers on walks, a microfiber cloth to dry lenses and flashlights, and the lens hood to keep drops off the front element. Don’t change lenses in dust, wind or rain; if you must, point the camera down.
  • At the end of the day: store your gear in a dry bag with plenty of silica gel. If you won’t use the camera for several days, take the batteries out. It’s good practice, though it doesn’t prevent condensation: the sealed bag does.

Herping: Photographing Amphibians and Reptiles Responsibly

On night walks, how you photograph matters as much as what you photograph. Our field ethics apply in full (see “Ethics and Animal Welfare” above), with extra care after dark: diffused flash at the lowest power that works, and only a few frames of each animal. Travelers don’t handle the animals; if one has to be moved, your Tour Leader does it and releases it right beside where it was found, in the same microhabitat.

Safety in the field

  • Never assume an animal is harmless. Don’t touch or try to move a snake or any animal you can’t identify: venomous species can be hard to tell apart. Moving an animal is always your Tour Leader’s call.
  • Stay with your Tour Leader and the group on night walks. Watch your step on wet, slippery ground and keep the camera on a sturdy strap.
  • Use a headlamp with spare batteries, and keep both hands free when you move between shots.

Technique for amphibians and reptiles

  • Diffused, off-camera flash: it softens the light and avoids harsh reflections on wet skin. Use the lowest power that works and keep the number of frames on each animal short.
  • Get low and mind the ground. Shoot at the animal’s eye level and take care with the leaf litter, moss and branches around it: the microhabitat is part of the story, and part of what you must not disturb.
  • Narrow apertures and manual focus. Depth of field is razor-thin this close: work around f/11 to f/16, focus manually and consider focus stacking for full sharpness.
  • Build your own diffuser. You don’t need expensive gear: we’ll show you how to make a good one from household materials.

Every photo you take in the field should leave the animal and its habitat as you found them.

Recommended Equipment and Gear Checklist

You can choose a light kit for maximum mobility, or a more complete setup (camera, macro lens, external flash, diffuser and tripod). Pack with intention: less weight, more precision.

Herping and macro tours: what you can’t forget

  • Main camera body
  • Macro lens
  • External flash and rechargeable batteries
  • Light diffuser (soft or dome type)
  • Camera batteries and charger (at least three charged batteries, four if your camera is mirrorless)
  • Flash transmitter and receiver (triggers)
  • Stable tripod or mini tripod
  • Fast memory cards with enough capacity for burst shooting
  • Power strip or extension cord

Recommended options (by your style)

  • Telephoto lens (for birds or distant wildlife)
  • Wide-angle lens (for landscapes or environmental portraits)
  • Additional macro or close-up lens (for example Raynox DCR-250)
  • Extension tubes (for more magnification)
  • Reverse ring (for extreme macro)
  • Polarizing filter (to control reflections)
  • Articulated arm (for example Wimberley Plamp II)
  • Foldable 5-in-1 reflector (around 30 cm)
  • Silica gel and dry bags (against humidity)
  • Laptop and charger, with editing software installed

Gear examples

Diffuser (for example LumiQuest or Triopo), flash (for example Godox), wireless trigger, articulated arm (Wimberley Plamp II), GorillaPod, power strip and a macro lens. Bring the category, not the brand: any reliable equivalent works, and we’ll help you get the most out of what you own.

Equipment Rental (Optional)

To help you travel lighter, we can arrange optional rental gear on some tours. Availability, sizes and camera compatibility vary, so ask us for current rental options when you book.

Field Comfort Kit

Rubber boots, headlamp, waterproof poncho and walking poles.

Macro Lighting Kit

Wireless trigger, flash and diffuser, for photographing amphibians and reptiles in low light.

Macro Lens

For travelers who don’t own one or prefer not to fly with it. Tell us your camera brand and mount so we can check compatibility.

Ready for the Field?

Every tour page has a Recommendations tab with what is specific to that trip. If you have questions about your gear, write to us before you travel: info@keepingnaturetours.com