Do You Know What Macro Photography Is?
Macrophotography is a fascinating technique that allows us to photograph small subjects at a reproduction ratio of at least 1:1 (meaning the subject appears on the sensor at the same size as in real life). This extreme close-up reveals textures, colors, and structures that would otherwise go unnoticed, transforming the tiny into something majestic and captivating.
Beyond its visual allure, macro photography invites us to slow down and observe the unnoticed intricacies of the natural world. It turns a simple leaf into a textured landscape, or an insect’s eye into a mosaic of geometric precision. This technique not only enhances artistic expression but also plays a vital role in science, education, and conservation—helping to document biodiversity, uncover patterns of adaptation, and ignite curiosity about life on a miniature scale.
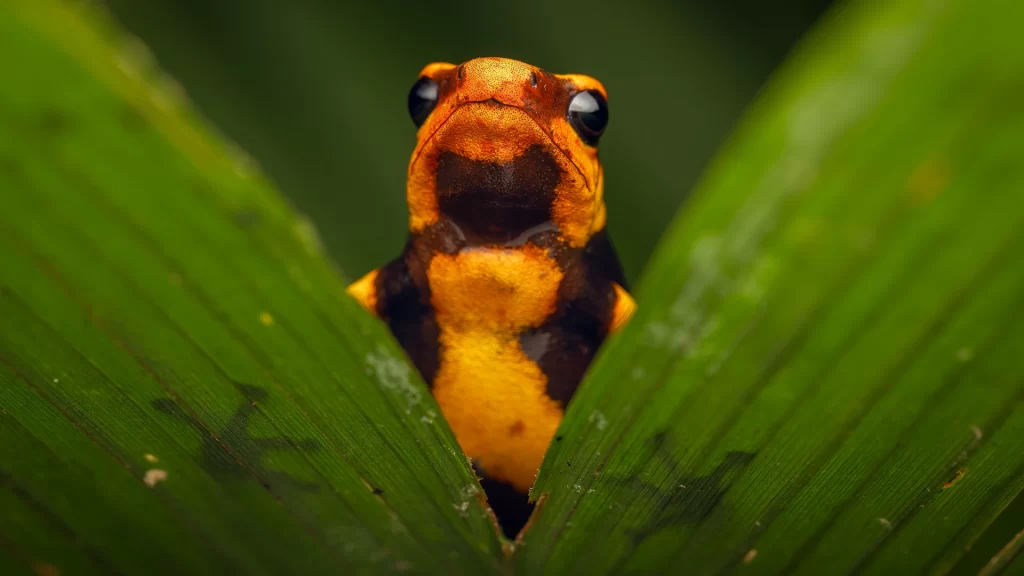
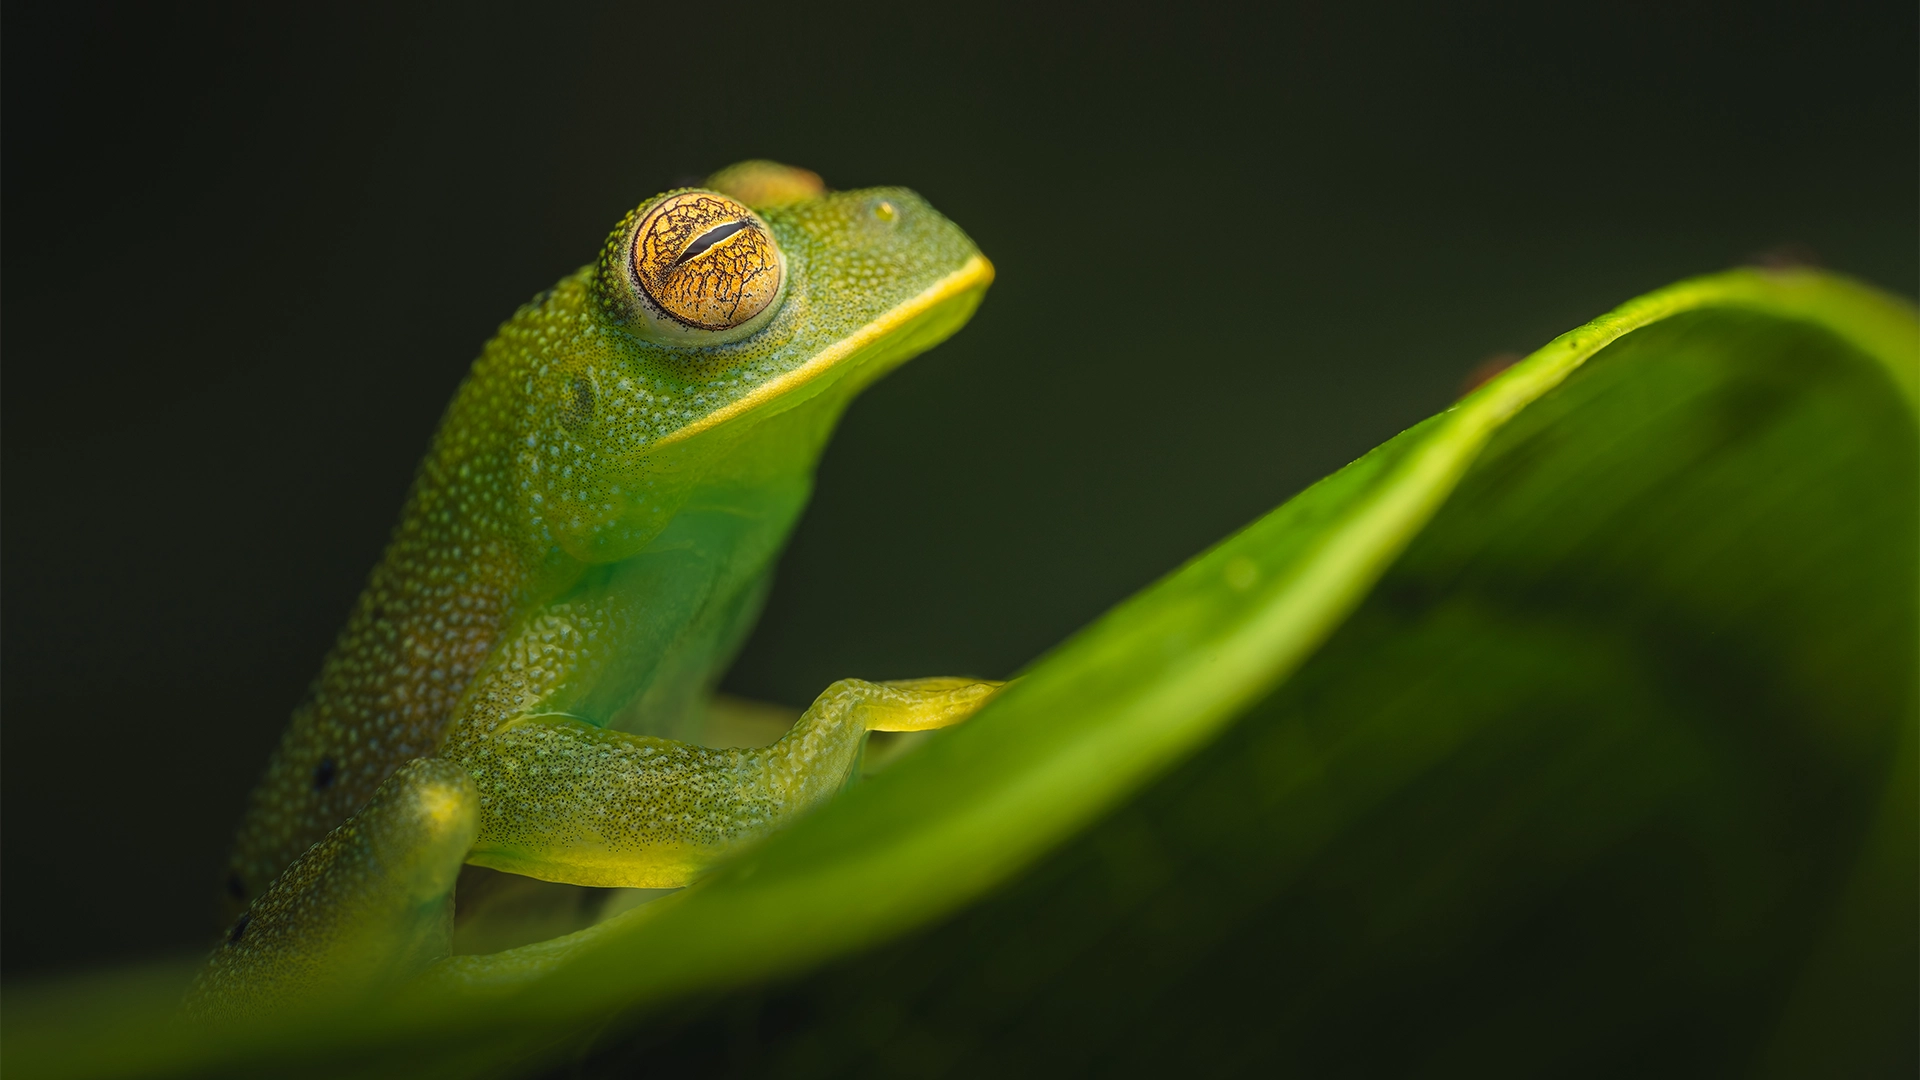
Macrophotography reveals the details of Oophaga lehmanni, a poisonous species whose skin warns of its toxicity. Photo: Jhonattan Vanegas.
The term “macro” means “large,” so this photographic style focuses on capturing the tiniest details of a subject and making them appear larger than life. It’s one of the few disciplines that allows us to explore a hidden universe, where the patterns on a butterfly’s wings, a dragonfly’s compound eyes, or dewdrops on a leaf become the stars of stunning images.
In addition to insects and flowers, macro photography is ideal for capturing the beauty of amphibians and reptiles, highlighting the texture of their scales, the shine of their moist skin, or the hypnotic depth of their eyes. In environments like the Amazon rainforest or the Andean páramos of Colombia, this technique becomes a powerful tool for documenting biodiversity and revealing species in all their splendor.
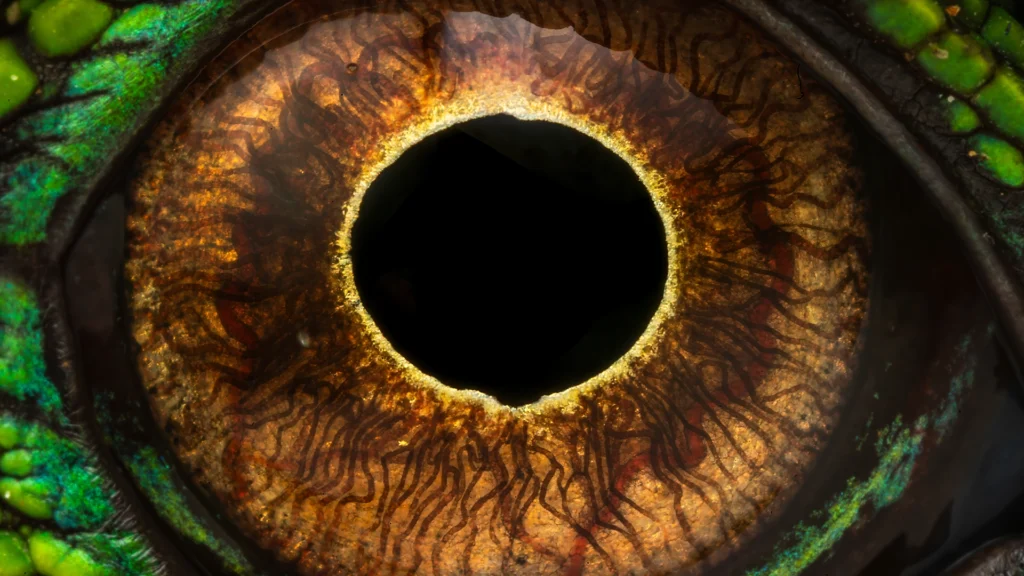
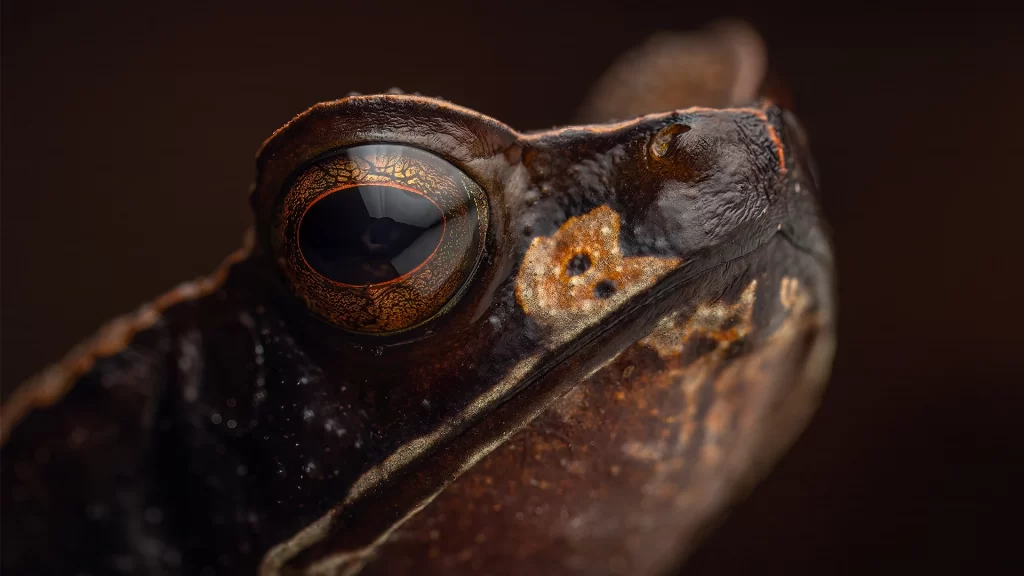
The eye of Enyalioides laticeps is adapted to detect subtle movements in low-light environments. Photo: Jhonattan Vanegas.
The Art and Practice of Macro Photography
To achieve extraordinary macro images, it’s essential to plan your shot, consider the lighting, choose the right camera and lens, and control the depth of field to keep the subject’s key point in sharp focus. Whether for scientific exploration, conservation, artistic photography, or just for fun, macrophotography opens a window into a miniature world full of life and beauty that often goes unnoticed.
Mastering macro photography also requires patience and observation. Many of the most compelling images come from waiting quietly, studying the behavior of your subject, and understanding its interaction with the environment. As you begin to notice subtle movements, textures, and rhythms in nature, your approach becomes more intuitive and respectful. In this way, macro photography not only sharpens your technical skills, but also deepens your connection with the natural world.
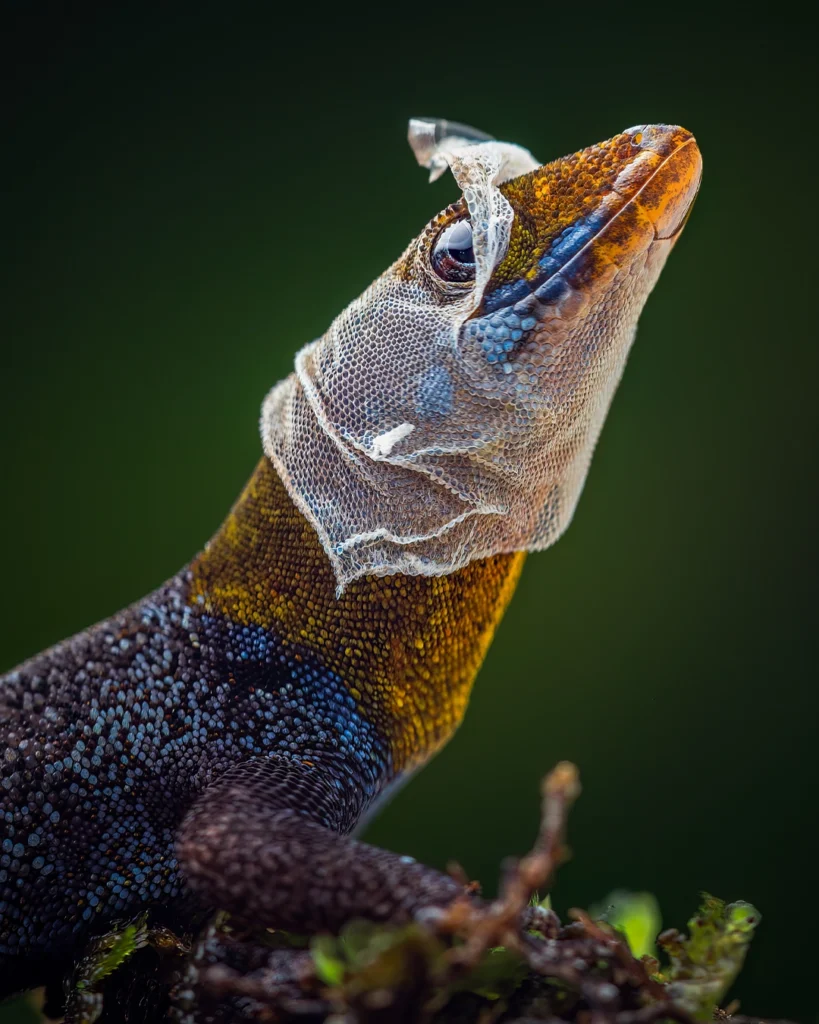
Shedding is an essential physiological process in reptiles like Gonatodes albogularis, allowing them to eliminate parasites and renew their skin to maintain functionality. Photo: Jhonattan Vanegas.
Types of Macro Photography
Macro photography includes various levels of magnification and techniques that allow us to capture the beauty of the small. From subtle close-ups to exploring microscopic details, each type offers a unique perspective of the natural world. Here are the main categories:
Close-Up Photography
This type, also known as “pseudo-macro,” captures small subjects at a magnification ratio below 1:1, meaning the subject doesn’t appear life-size on the sensor. It’s great for highlighting details visible to the naked eye, such as the structure of a flower’s petals, the texture of a lizard’s skin, or the sheen of a butterfly resting on a leaf. Technically, any image taken with a reproduction ratio greater than 1:10 is considered close-up photography. Within the range of 1:10 to 1:4, the term “close-up” is commonly used, while the term “macro photography” is properly reserved for images with a magnification of 1:1 or higher. Achieving magnification beyond 1:4 typically requires specialized gear such as extension tubes, close-up filters, or dedicated macro lenses designed to focus at very short distances.
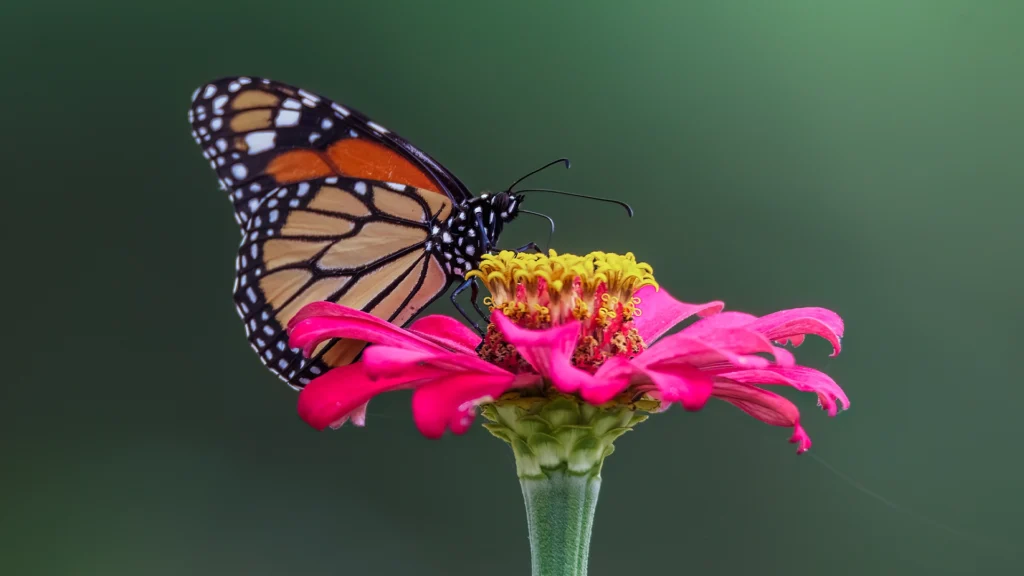
Although not taken with a dedicated macro lens, the Sigma 150–600mm allows for remarkable detail when photographing subjects like this butterfly at close range. Photo: Jhonattan Vanegas.
True Macro Photography
At this level, the image has a 1:1 ratio or higher, meaning the subject appears life-size or larger on the camera sensor. This is considered the starting point for true macro photography, distinguishing it from close-up photography, which includes lower magnification ratios ranging from 1:10 to 1:4. With 1:1 magnification, one centimeter of a subject in real life occupies exactly one centimeter on the sensor—revealing a new level of detail and visual intimacy.
This scale allows photographers to capture extraordinary textures and microstructures, such as the overlapping scales of a snake, the compound eyes of a dragonfly, or the delicate droplets resting on a frog’s skin. Reaching and exceeding this magnification often requires specialized equipment like dedicated macro lenses, extension tubes, or even bellows. True macro photography also introduces technical challenges: extremely shallow depth of field, light loss due to extension, and sensitivity to vibrations, all of which demand precise control over focus, aperture, and stability.
In essence, true macro photography transforms our way of seeing—turning the unnoticed into the unforgettable, and the invisible into something emotionally and scientifically profound.
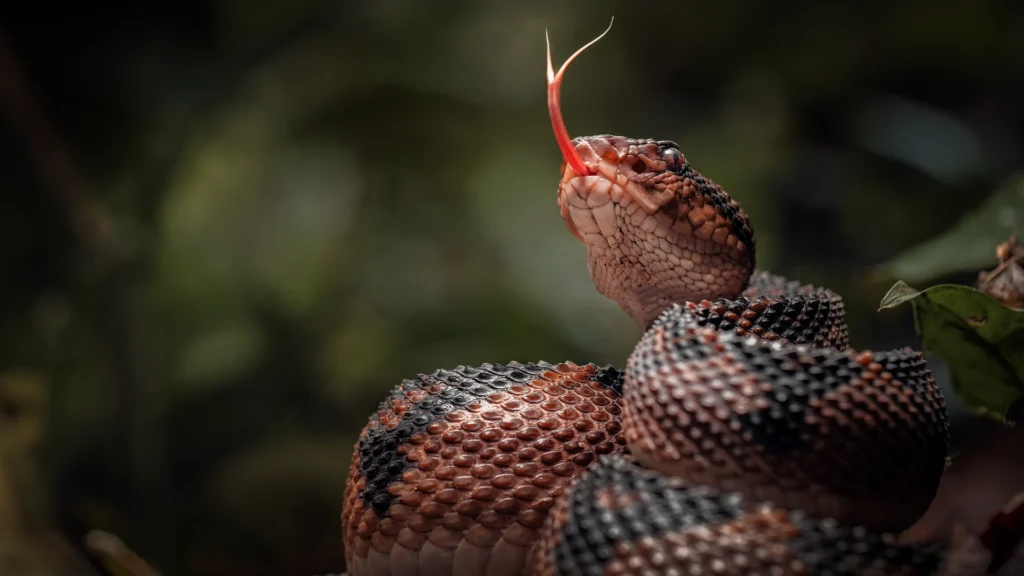
Close-up of Lachesis muta, the largest venomous snake in the Americas, known for its cryptic pattern and elusive behavior. Photo: Jhonattan Vanegas.
Super Macro Photography
When magnification exceeds 5:1 or even 10:1, we enter the realm of super macro photography—a space where the tiniest structures become vast landscapes. This level of magnification reveals textures invisible to the naked eye, such as the crystalline patterns on butterfly wings, the intricate layering of reptile scales, or the delicate transparency of glass frog skin. Achieving this requires specialized setups like reversed lenses, extension tubes, or bellows, often combined with high-magnification macro lenses.
Working at this scale presents unique challenges: the depth of field becomes razor-thin, vibrations are magnified, and lighting must be precisely controlled to avoid unwanted shadows and glare. Photographers rely on tools like focusing rails, diffused lighting, and manual exposure adjustments to achieve sharp, well-lit images. Super macro photography is both a technical feat and a window into a hidden world, where every millimeter holds a universe waiting to be discovered.
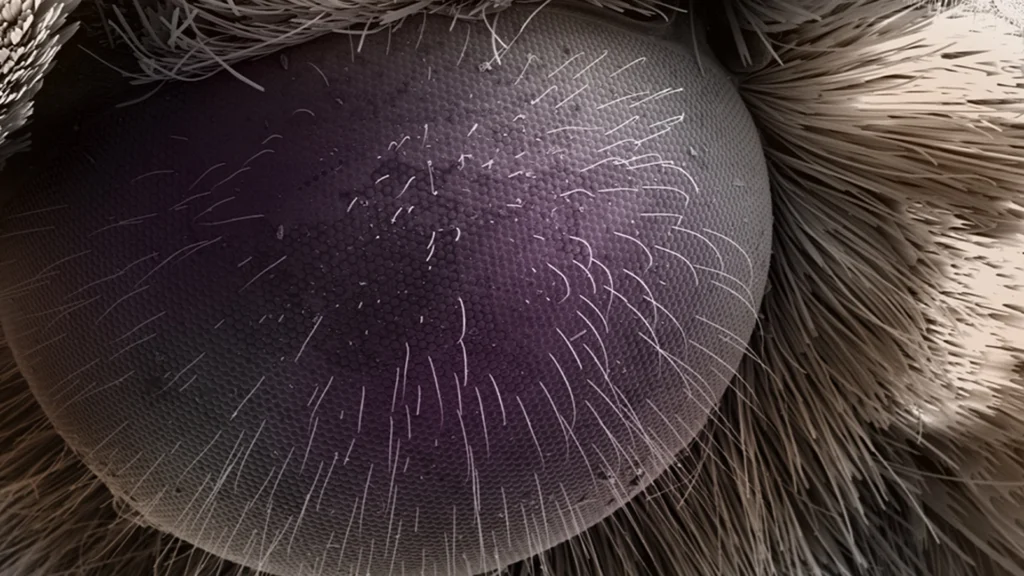
Detail of the compound eye of an owlet moth, captured under scanning electron microscopy. A perfect example of super macro revealing structures far beyond human vision.
Photomicrography (Micro Photography)
This goes beyond traditional macro and requires microscopes attached to cameras to achieve extreme magnification, usually over 20:1. It’s mainly used in scientific research and conservation to document imperceptible details of flora and fauna.
At this level, the camera is no longer the primary tool, but rather an extension of the microscope. Specialized objectives, stable mounting systems, and precise lighting setups—often with transmitted or reflected light—are essential to obtain clear and meaningful images. Photomicrography is commonly used in fields such as entomology, histology, botany, and mineralogy. Through stacking techniques and image processing, it is possible to overcome the extremely shallow depth of field and produce images with remarkable clarity and depth, unveiling a universe of microstructures that define the building blocks of life.
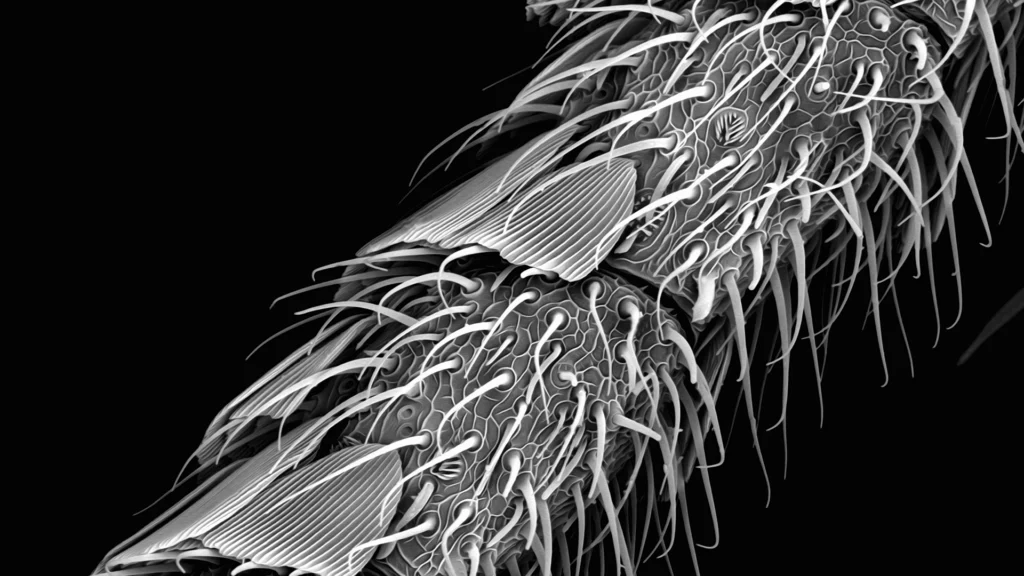
At extreme magnification, the delicate surface of a moth’s antenna reveals an intricate array of sensory hairs.
What Can We Photograph?
Macro photography unveils a hidden world full of surprising detail. With this technique, we can capture the beauty of the tiny and reveal textures, colors, and patterns that would otherwise go unnoticed. Colombia, with its immense biodiversity, is an unrivaled destination for macro photography lovers, offering unique natural settings to explore this art.
From the misty páramos to the lush Amazon rainforest, the country is home to an extraordinary variety of insects, amphibians, reptiles, and plants that provide endless subjects for exploration. Each leaf can harbor a microcosm of life, each droplet a mirror to the complexity of nature. In these ecosystems, macro photography becomes more than an artistic expression—it becomes a tool for discovery, documentation, and conservation, allowing us to tell stories that begin where the eye alone cannot reach.
Ideal Macro Subjects in Colombia
- Insects: Butterflies, beetles, dragonflies, bees, and mantises—all with fascinating patterns and colors.
- Plants and flowers: From the Andean páramos to the Amazon, Colombia is home to thousands of orchid, moss, and fern species with incredible structures.
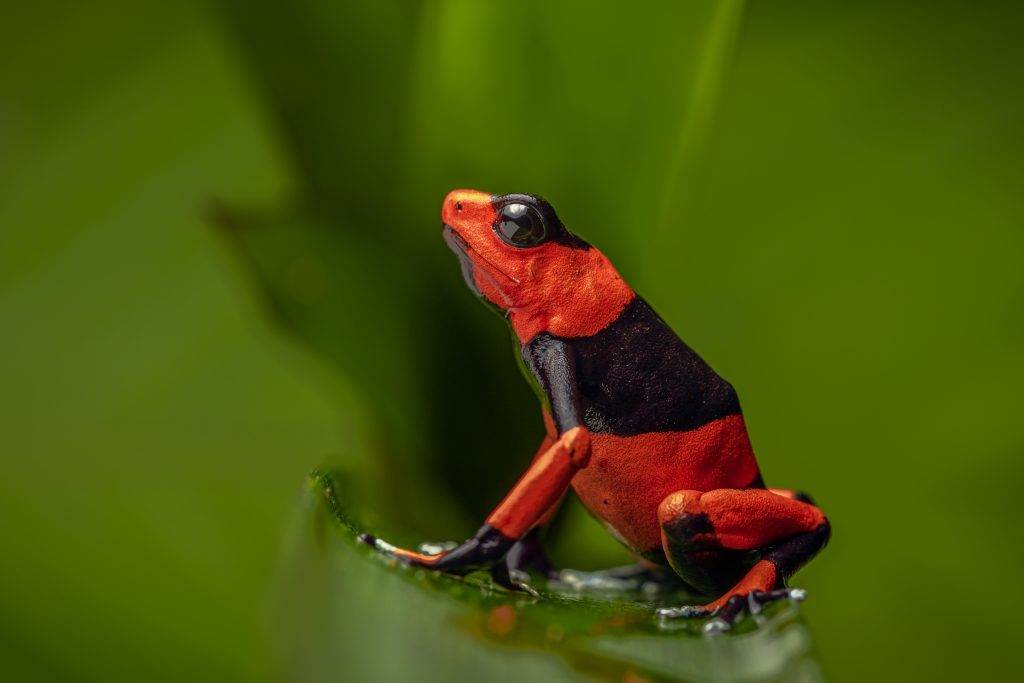
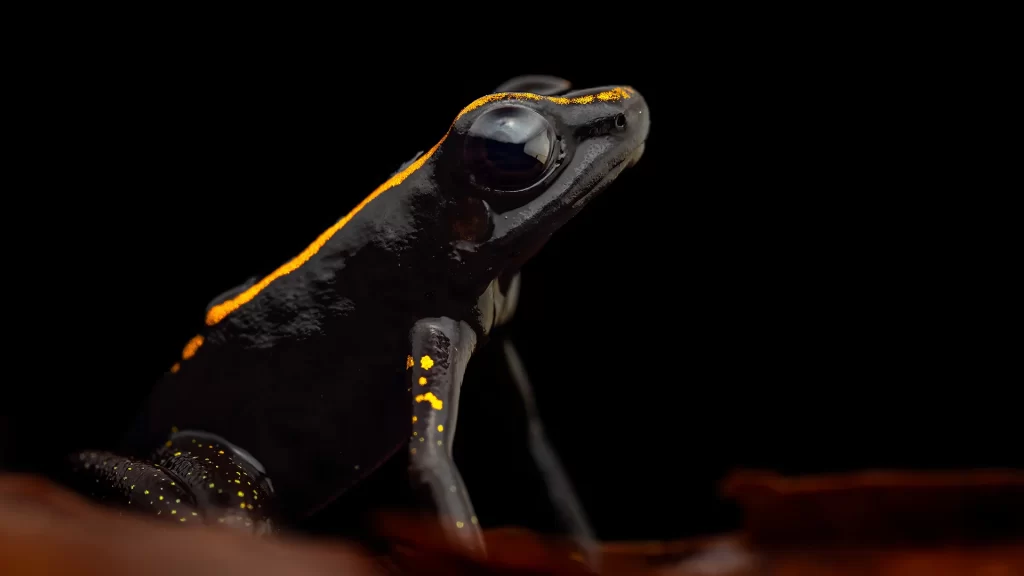
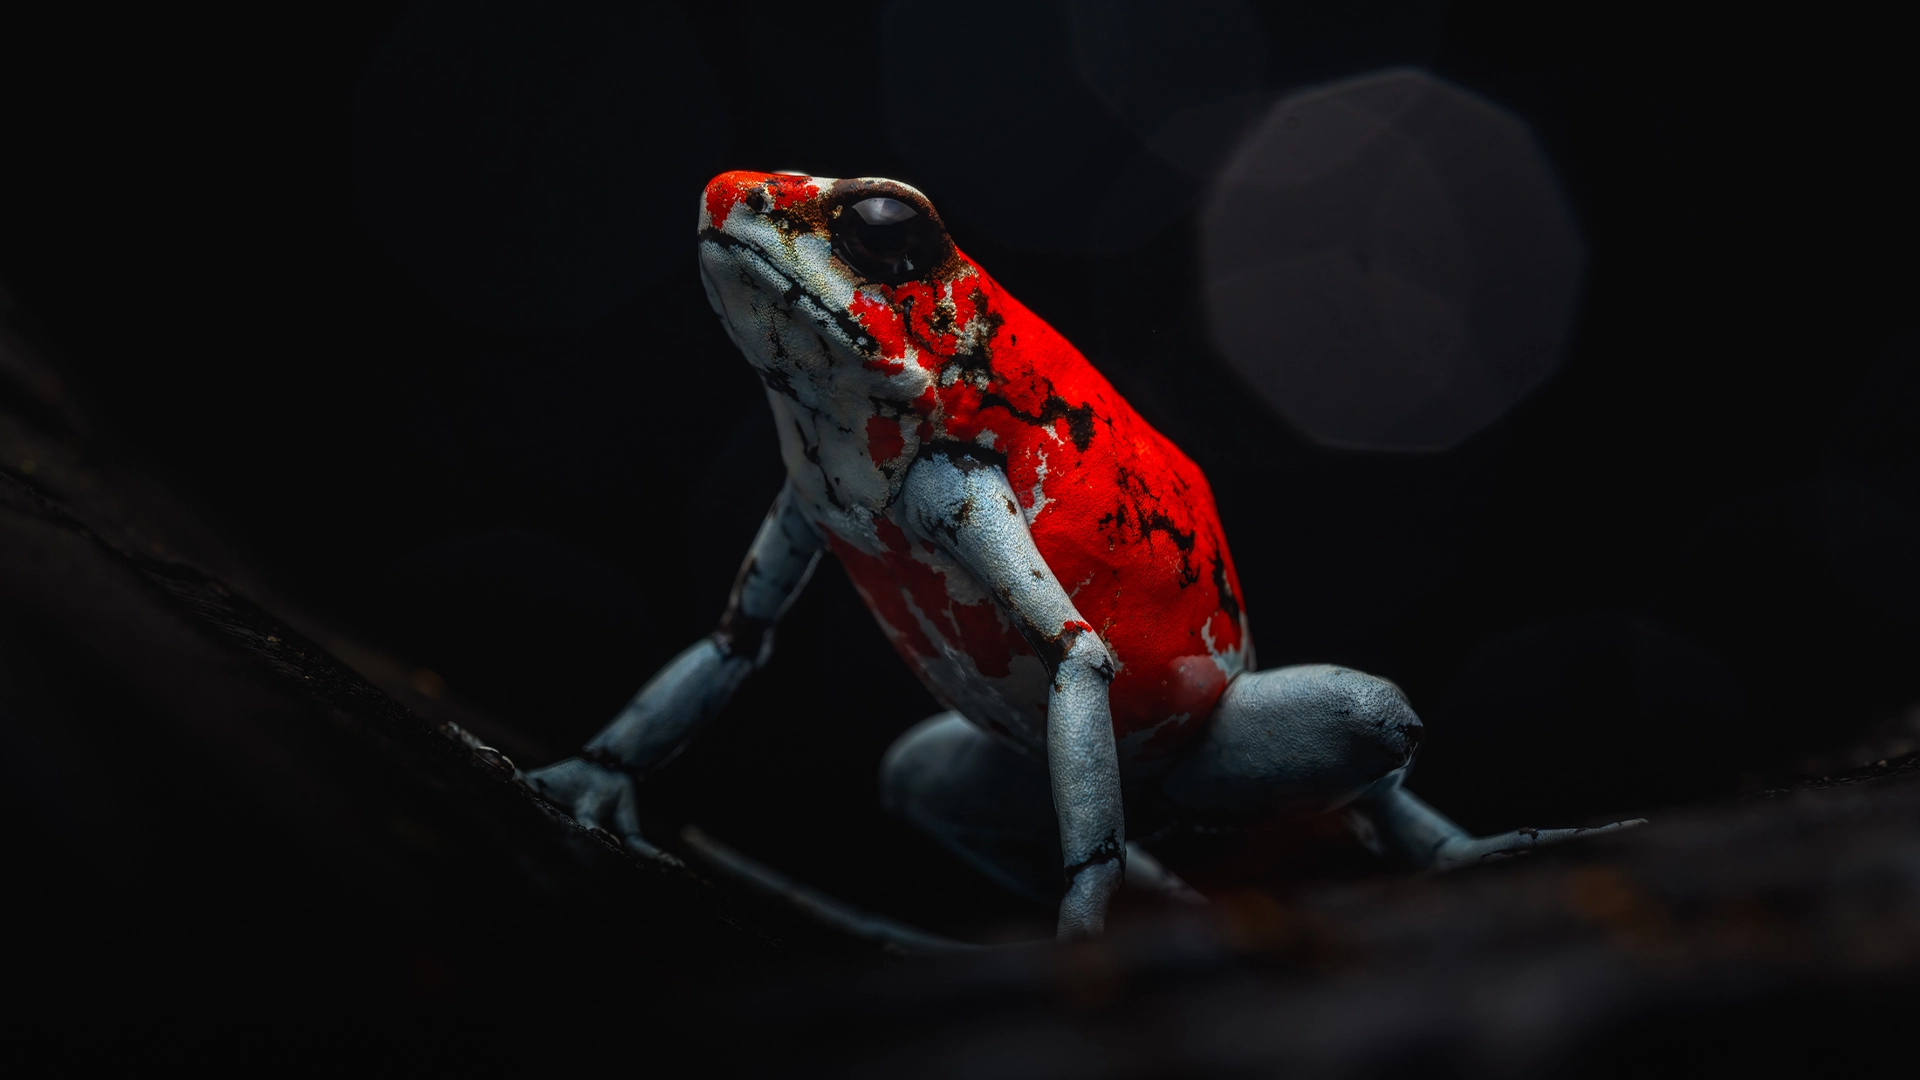
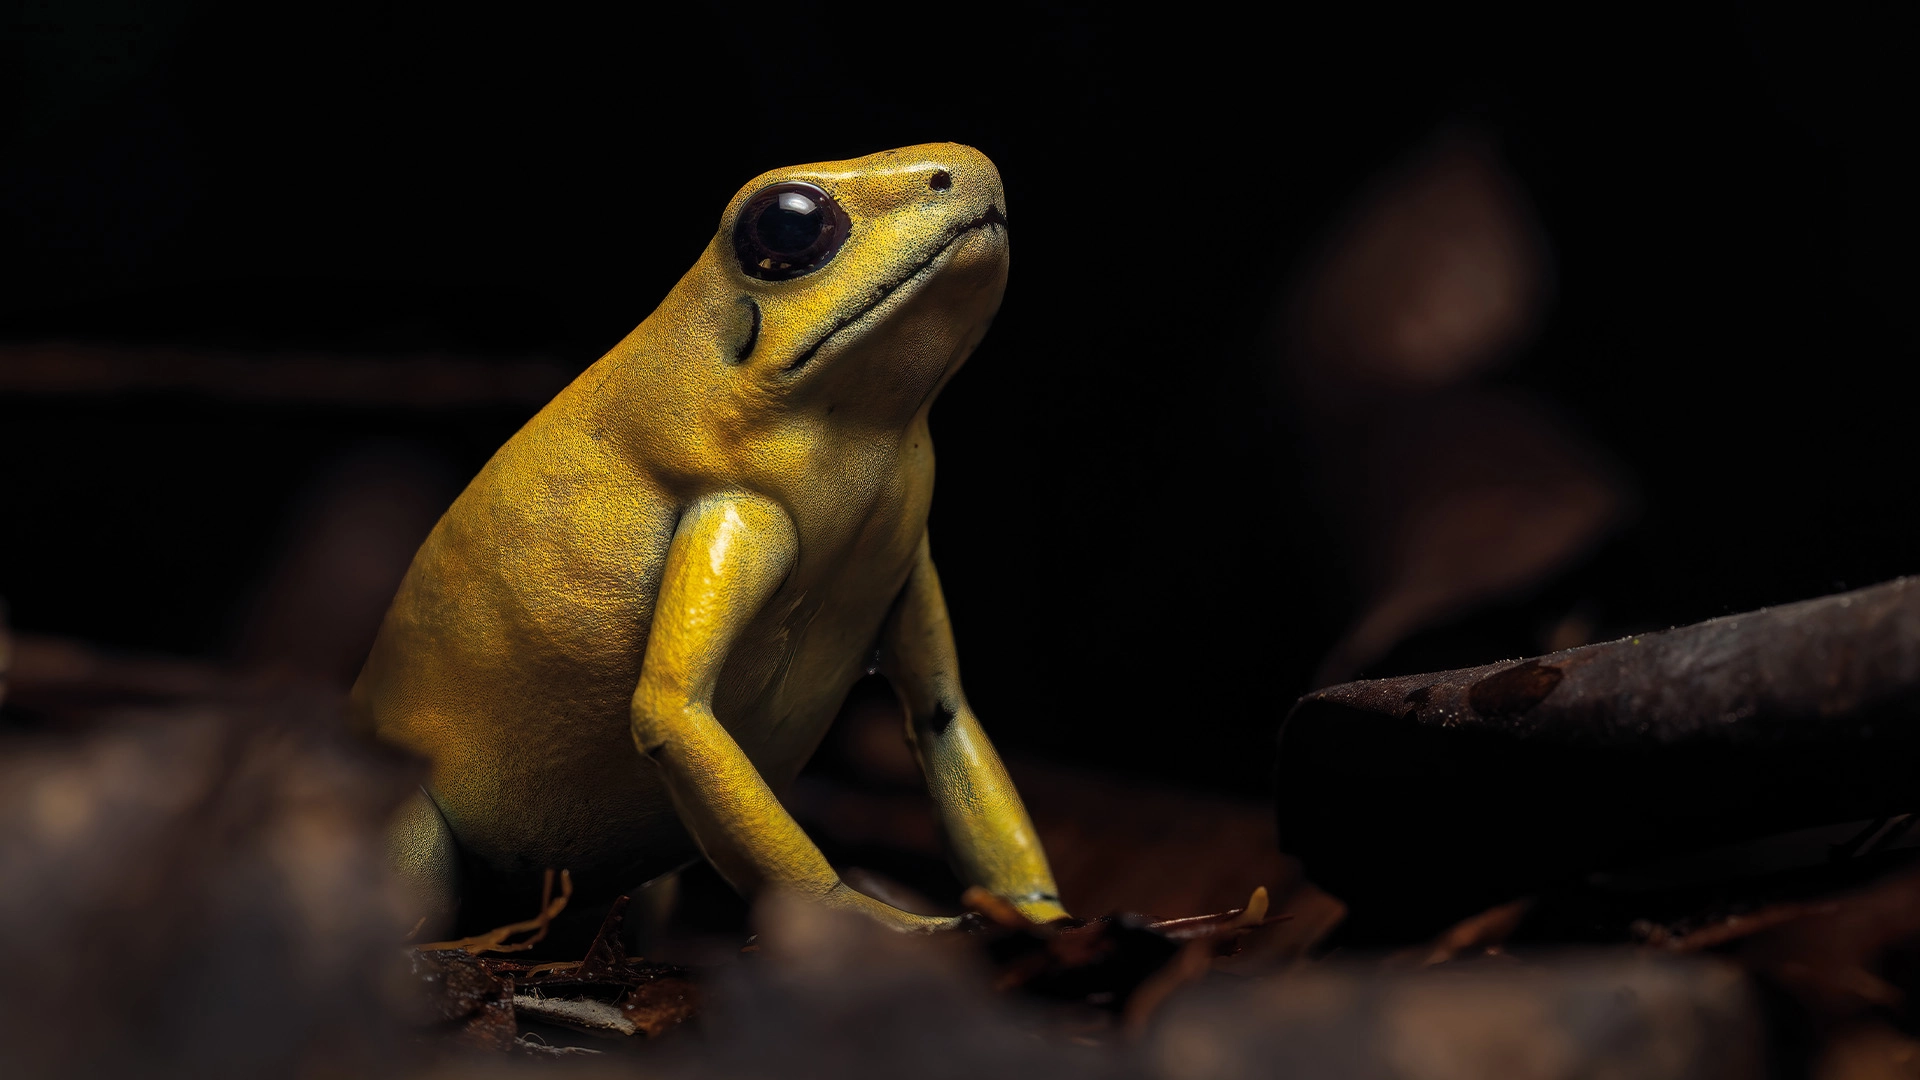
- Amphibians and reptiles: Brightly colored dart frogs, camouflaged snakes, and iridescent-scaled lizards—perfect for capturing skin and eye detail.
- Natural textures: Bioluminescent fungi, water droplets on tropical leaves, and lichens in cloud forests create unique visual scenes.
Essential Equipment for Macro Photography
Choosing the right gear is key to achieving quality macro images. Here are the best options based on your level and budget. Whether you’re just starting out with close-up photography or looking to refine your technique with specialized tools, your equipment will shape the kind of images you can create. Factors such as magnification capability, focusing precision, and lighting control all depend heavily on the tools you use—from the type of camera body to the choice of lens and accessories. Understanding your needs and the environments you’ll be working in will help you decide between lightweight versatility or high-end precision. Let’s explore the essential components that will bring your macro vision to life.
1. Cameras for Macro Photography
Selecting the right camera is crucial to achieve sharp, detailed, well-exposed macro images. The best choice depends on your experience level, budget, and desired type of macro work.
DSLR and Mirrorless Cameras
These offer manual control, excellent image quality, and the ability to use dedicated macro lenses. Key features include:
- High-resolution sensors (30 MP to over 60 MP) for extreme detail
- Precise manual focusing
- Great performance in low light (perfect for forests and jungles)
- Compact or rugged bodies for portability or ergonomics.
Recommended for: Photographers seeking maximum image quality and full control over settings and lenses.
Macro photography in action, this carousel showcases the level of detail achievable with DSLR and mirrorless cameras equipped with dedicated macro lenses. Photos: Jhonattan Vanegas.
Advanced Compact Cameras
While not designed exclusively for macro, some advanced compacts offer excellent macro modes. Their benefits include:
- Lightweight, compact design for field expeditions
- Fast and accurate autofocus (great for moving insects)
- Affordable price-performance ratio.
Considerations: They offer decent macro capabilities but may be limited in depth of field, interchangeable lenses, and full manual control.
Recommended for: Those seeking a practical and portable option without heavy investment.
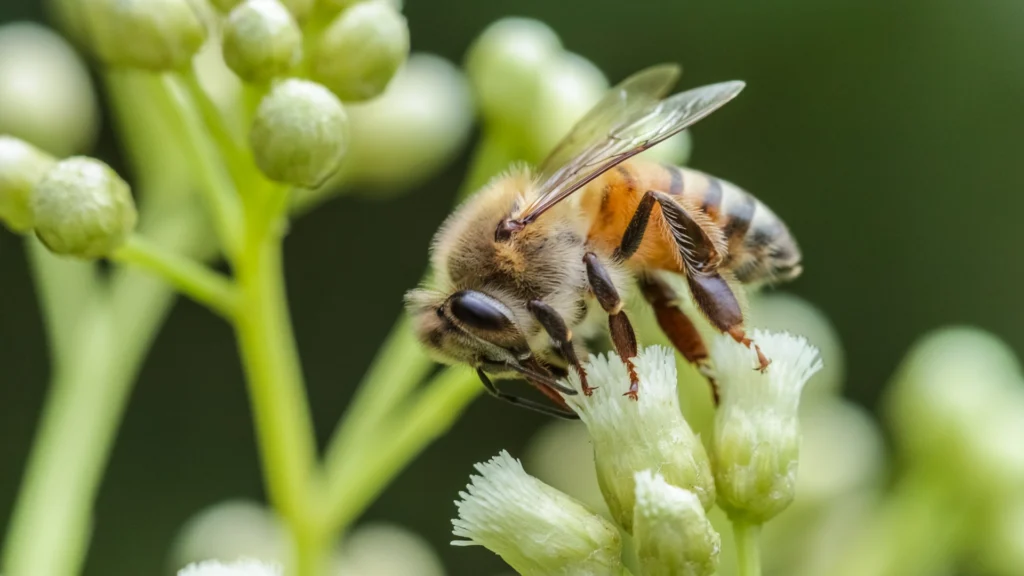
Captured with an advanced compact camera, this bee reveals how much detail is possible without a dedicated macro setup. Photos: Jhonattan Vanegas.
2. Macro Lenses
For stunning macro images, the best investment is a good macro lens. These are designed for short focusing distances and magnifications of 1:1 or higher.
Macro lenses are also versatile for portraits, product, or artistic photography due to their optical quality and depth-of-field control. They usually have wide apertures (f/2.8 – f/4), enabling smooth bokeh and good low-light performance.
Focal Length Options and Uses
- 50mm – 60mm: For static subjects and studio work. Great for flowers, leaf textures, and small still objects. These lenses offer a wider field of view and require you to get closer to the subject, making them ideal for controlled environments.
- 90mm – 105mm: Ideal for insects and shy subjects. These lenses offer a comfortable working distance and good subject isolation, perfect for photographing frogs, reptiles, and other medium-sized subjects in the wild.
- 150mm – 200mm: For very timid species like butterflies and dragonflies. Longer focal lengths allow you to maintain a safe distance while achieving a tight composition, helping avoid disturbing sensitive wildlife. They also offer excellent background compression and bokeh.
Specialty Macro Lenses
In addition to standard focal lengths, there are unique macro lenses that open up creative possibilities beyond traditional perspectives:
- 15mm Wide-Angle Macro (e.g., Laowa 15mm f/4): This lens combines 1:1 magnification with an ultra-wide perspective, allowing you to include your subject and its surrounding environment in the frame. It’s excellent for habitat shots or dramatic compositions where context matters.
- 25mm Super Macro (e.g., Laowa 25mm f/2.8 2.5–5x Ultra Macro): Designed for extreme close-ups, this lens offers magnification from 2.5x to 5x. It’s ideal for photographing small insects or textures that are invisible to the naked eye. Due to the very narrow depth of field, it often requires a focusing rail and precise lighting control.
- 24mm Probe Lens (e.g., Laowa 24mm f/14 Probe): A highly specialized lens with a long, narrow barrel that can be inserted into tight or hard-to-reach spaces. It offers a wide-angle view at 2:1 magnification and is often used in video and creative nature photography. Its built-in LED ring light and waterproof front make it perfect for documenting animal burrows, flower interiors, or underwater scenes.
These specialty lenses expand the boundaries of macro photography, turning it into a powerful storytelling tool—capturing not just the subject, but also the environment and perspective that surrounds it.
Exploring two perspectives of the macro world: the intimacy of a 100 mm lens and the immersive storytelling of a 15 mm wide-angle macro. Photos: Jhonattan Vanegas.
3. Accessories for Increased Magnification
To go beyond the native 1:1 magnification of most macro lenses, several accessories can be used to increase the level of detail captured—each with its own advantages and considerations:
- Extension Tubes: These are hollow rings placed between the camera body and the lens, effectively reducing the minimum focusing distance and increasing magnification without adding additional glass elements. They come in various lengths and can often be stacked for greater effect. However, they also reduce the amount of light reaching the sensor, so exposure adjustments or external lighting may be necessary.
- Reversed Lenses: This technique involves mounting a lens backward using a special reverse ring adapter, turning a standard lens into a high-magnification tool. It works best with prime lenses around 28–50mm. While this method can produce impressive results, it typically eliminates electronic communication between the lens and the camera, meaning you’ll need to control aperture and focus manually.
- Close-Up Filters: These are screw-on lenses that attach to the front of a regular lens, functioning like a magnifying glass. They’re a lightweight, affordable option for casual macro shooters and great for travel. However, they can introduce some image distortion or softness, especially around the edges, depending on their quality and optical coating.
These accessories offer flexible and creative ways to explore the world of high-magnification photography without necessarily investing in specialized macro lenses. They are particularly useful for photographing very small subjects like insects, minerals, or plant textures, and can serve as excellent tools for experimentation and learning.
These macro shots demonstrate how different accessories can unlock extreme detail in subjects often invisible to the naked eye. Photos: Jhonattan Vanegas.
4. Tripod and Remote Shutter
A stable tripod reduces vibrations, and a remote or timer prevents camera shake during shutter release. In macro photography, even the slightest movement can result in blurred images, especially when working at high magnification or with long exposure times. Using a tripod not only stabilizes your setup but also allows you to fine-tune composition and focus with precision.
For best results, choose a tripod with adjustable legs and a ball head or geared head for smooth, controlled positioning. Pairing it with a remote shutter release or using the camera’s self-timer function minimizes contact during shooting, which is essential when working with narrow depth of field or in low light. In field conditions, a compact or flexible tripod (like a Gorillapod) can offer more versatility, while in-studio setups benefit from heavy-duty tripods with center columns and micrometric rails. Stability isn’t just a technical choice, it’s what allows sharpness to meet stillness in the world of the tiny.
When using a tripod and a remote shutter, you gain the freedom to slow down and sculpt the light exactly as you want it. These images are proof that with stability and patience, creative lighting becomes part of your artistic voice. Photos: Jhonattan Vanegas.
5. Lighting for Macro Photography
Lighting is crucial, especially when photographing amphibians and reptiles in low-light habitats. Proper lighting enhances textures, colors, and patterns without harsh reflections.
Natural Light
- Golden hour: Ideal for soft, warm light and gentle shadows.
- Window or open shade: Even lighting in controlled setups.
- Creative backlighting: Highlight subject silhouettes and shapes.
Flashes and Diffusers
- Ring flash: Surrounds the lens for even lighting without harsh shadows.
- External flashes with DIY diffusers: Softens light while preserving volume.
- Light bounce: Reflect light using natural or artificial surfaces (e.g., white cardboard).
Specific Tips for Amphibians and Reptiles
- Avoid harsh reflections on moist skin: Use bounced flash or diffusers.
- Enhance scale texture: Side lighting brings out patterns and 3D effect.
- Light up eyes naturally: A soft side light enhances eye sparkle without artifacts.
Bonus Tip: If shooting in humid forests, bring a diffused flashlight to pre-light the subject and adjust exposure properly before shooting.
If you’re just starting out or looking to improve your macro results, we recommend reading our next blog, where we’ll dive deeper into lighting setups, accessories, and how to practice ethical photography that doesn’t disturb nature.